

How To Clean Space Off My Mac
A full startup disk is something that every Mac user volition experience. This problem used to be known as "Startup deejay full" notification. Still, on newer macOS versions this bulletin has been inverse to "Your deejay is almost full."
But luckily, it's a problem that has many solutions. And in this article, we'll become over:
- What is startup disk full?
- What's causing "Your disk is almost full" alert?
- How to prepare startup disk full?
- How to preclude "Your deejay is virtually full" problem?
However, we also understand that some people are curt on time and merely want to set startup disk total. So, if you're not really interested in what information technology is and why it happens, but skip the next two sections and caput to "How to Clean Your Startup Disk".
Or, even better, if you're looking how to clear space on Mac, we'd highly recommend a utility called CleanMyMac X. It'll help y'all clean up gigabytes of disk space in merely minutes (you can download it here).
Note: if you're running a newer version of macOS, it has a congenital-in option of Optimized Storage that is supposed to solve the problem of the full hard drive by moving files into the cloud.

By clicking "Manage" yous can open the card and come across what Optimized storage offers. Nonetheless, it moves junk and useless files to the cloud together with your files, and eventually, you end up paying for iCloud storage to store junk. So nosotros notwithstanding recommend getting CleanMyMac and actually dealing with extra files rather than simply moving them.

At present, with all that said, allow's get into what exactly "Your disk is almost full" means.
Understanding What "Your Deejay is Almost Full" Means
What is a startup deejay?
A startup disk, every bit taken from Apple Support commodity, is a volume or partition of a bulldoze that contains a usable operating organisation. Still confused? Permit'southward break it down for you.
Your Mac hard drive consists of disks (or partitions). Each disk (or sectionalization) has your Mac data on it, which consists of your operating system, applications, etc. Virtually Mac users have only ane disk but ability users may have two or more.
Let's look at an instance of a Mac with simply one hard disk:
- Your Mac's hard drive is 500GB.
- It has one "deejay" on it, and so all 500GB of storage is on that disk.
- The disk has an operating arrangement (macOS Monterey), and user data (apps, etc).
- And since you just have 1 disk, this is your startup disk: all 500GB.
A Mac with two disks will accept the storage divided between them. The Mac drive with the Bone on information technology is the startup disk while the other drive is just used for storage of files. Information technology's possible to have multiple startup disks, but most Macs will just have one. And for proper disk cleanup on Mac, all drives are just as important.
Why your disk is most full?
This is easy. Information technology'due south a lot like why is your refrigerator total? There is no more than space! Your disk is almost full and this is very bad news for any drive. A hard deejay should never get beyond 85% capacity (especially a startup disk) equally you will experience slowness and errors the further you get above that marking.
If your startup disk is full and yous become a message of alarm from your Mac, this is a serious indication that you need to clear up storageimmediately.
What to do when your disk is near total?
So how do you gear up your nearly full startup disk? The same mode yous solve the trouble of a packed fridge - you need to clear upward storage, of form. To brand more space on your startup disk you volition need to:
- Delete files from your Mac.
- Move files to an external hard drive or cloud storage.
- Or install a second internal hard drive on your Mac.
So, now that we know what a startup disk is, we demand to talk nearly how to fix it. Let's take a closer look at your disk space to see exactly what is causing your disk to be nigh total.
What's Causing "Your Disk Is Almost Full" Alert?
Short version: Accept a expect nether-the-hood of your Mac.
Before we tin see what is taking up space on your startup disk, first we have to find it:
- Hover on the Dock at the lesser of your screen and open Finder.
- Click on "Finder" in the menu bar at the top of your screen.
- Then select "Preferences…"
- In the window that opens, checkmark the "Hard disks" checkbox.
After selecting this box, your desktop should at present show the difficult disks on your Mac, in the form of icon(s), like this:
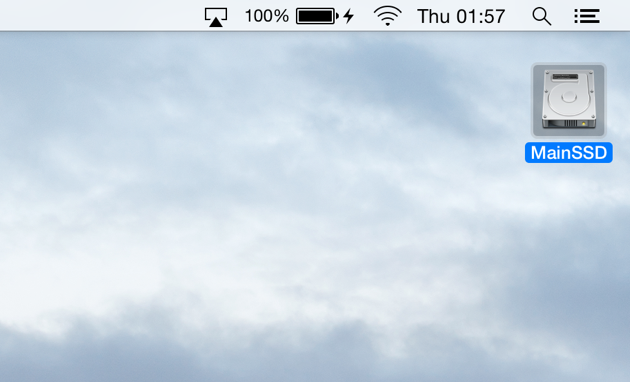
These are disks on your Mac that you lot tin can "startup", this is because they have operating systems on them. If there is more than 1 of these difficult deejay icons that show up on your desktop, it means you've got multiple hard disks on your Mac. If y'all only take one, skip the down to "What is taking up all of my startup disk infinite?" section.
If y'all take more than one, continue with the next step:
Click on the Apple icon at the acme left of your screen System Preferences > Startup Disk.
Hither, again, y'all'll find your hard disk drive(s); they're probably named something like MainSSD or MainHD. It will also display "OS" and the version number of that OS. If you have more than 1 Os drive, your startup deejay should be the one with the latest version of macOS running on it, but we're going to make sure of that in the adjacent stride.
I only have one and it looks like this:

To make 100% sure that you know what drive is your startup disk, follow these steps:
- Click on the Apple Icon in the menu at the acme-left of your screen.
- Select "About This Mac."
- Under macOS, you'll find a version number. Mine is 12.0.one, like so:

Run into how my version number in the "Most This Mac" window matches the number in my Startup Disk section? Yep — That's my startup disk. Constitute yours? Good.
What is taking up all of my startup deejay space?
Now that we've identified our startup deejay, let's take a closer look at how to clear up infinite on Mac:
- Click the Apple Icon in the menu at the acme-left corner of your screen.
- Cull "About This Mac."
- Click Storage.
Annotation: If you are running an older version of Os Ten you may have to first click "More than Info…" and then "Storage".
Have a expect at my hard bulldoze disk:

I've got 250GB of storage, and about 168GB of it is gratuitous.
So, how large is your hard disk drive? How much gratis space practice you accept (if any — *gulp*)? And what's taking upwards the nearly space? Information technology is of import to consider drive capacity and data storage needs for future storage plans — nosotros're non just here to fix the problem, for now, we're going to make sure you never have this problem in the future as well.
Now that we have the noesis, it'southward time to take action and ready your Mac'southward "Startup Disk Full" problem.
How to articulate deejay space on Mac
Permit's go over 11 things you tin can do to help prepare "your disk is near full." These should also give you other ideas equally to how else to set up it — You know your Mac better than nosotros practise!
1. Clear system storage on Mac

Arrangement storage cleanup sounds like a serious undertaking. But, technically, it boils down to just one matter: having the courage to scrap the old files.
- Search for large Zip/RAR archives in Downloads.
- Open your Desktop (Command + F3) and delete screenshots.
- In Applications, sort your apps by size. Delete the largest ones.
- Restart your Mac to free up RAM.
- Become rid of system junk files with a free version of CleanMyMac X.
This app gives y'all lots of possibilities to complimentary up space, peculiarly when it comes to system junk. CleanMyMac 10 has been notarized by Apple tree, which basically means it's safe to use. And if y'all got 5 minutes, try this tool as it shows yous where exactly your junk hides.

2. Clean up enshroud files on your Mac

Cache files are files that assistance your Mac run programs a bit more smoothly. Think of them like blueprints for a house: your Mac has the blueprints for how a program is supposed to load/run/look, so information technology loads it faster; without them, information technology'd be similar edifice it from scratch. However, over fourth dimension, these caches can outset to take up some serious space. Periodically, removing them can assist clear storage. And don't worry, your Mac will create fresh, new ones after y'all restart your Mac. To remove caches:
- Open a Finder window and select Go in the carte bar.
- Click on "Go to Folder…"
- Blazon in
~/Library/Caches
Delete the files/folders that are taking up the most space. - At present click on "Become to Binder…"
- Type in
/Library/Caches(simply lose the ~ symbol)
And, over again, delete the folders that have up the most space.
Deleting cache files is generally rubber for your Mac. And one time you lot delete them, the applications and processes you lot run on your Mac will generate fresh, new ones. Merely, when deleting, worry more about removing them based on size rather than just removing all of them.
Too, y'all can check the /Organisation/Library/Caches folder as well, but it might be better not to bear upon this folder without knowing what the items are. A utility that correctly cleans upward these files (and pretty much everything else on this list) is, you guessed it, CleanMyMac X. Information technology cleans up even your system caches with just a few clicks.
Oh, and in one case you're washed with this list, restart your Mac so it can create these new cache files.
Read more: How to Clear Enshroud on a Mac?
three. Get rid of localization files

Localization files are also known as "language packs." Lots of apps come up with other languages that you probably don't need. To articulate up space on your Mac, delete the ones y'all don't need:
- Open a Finder window.
- Go to Applications.
- Ctrl+click on an application.
- Select "Show Packet Contents."
From here, go to Contents > Resource and wait for files catastrophe in .lproj. These are the languages your app has just in case you lot desire to employ information technology in another language, like Castilian (es.lproj). Drag the ones you'll never use to the Trash.
Once more, a safer alternative to this would be to use CleanMyMac X. It gets rid of all of them with a click. No earthworks through application folders, just a cleaner Mac.
Read more: How to Delete Linguistic communication Files from macOS?
4. Delete duplicate files

Even if you lot have the most organized Mac on a planet, duplicates happen one manner or some other. It tin can be a file you've mistakenly downloaded twice or a post attachment you've opened several times. Regardless of how they appeared, those files sit on your Mac and gobble upwardly storage.
But finding and deleting them is a time-consuming procedure if you do it 1 by one. So here's what y'all tin can do for a elementary Mac disk cleanup:
- Open the Finder app on your Mac
- Move cursor over File and click New Smart Folder
- Click the "+" push in the upper right corner and choose the type of files you lot want to see
- Now sort them past proper name to quickly spot duplicates.
Remember to pay attention to the date of creation to brand sure you keep the true original, not the re-create.
While this is the best way to remove duplicates manually, it takes lots of your time and dedication. It'd exist much easier to leave this to Gemini 2: The Duplicate Finder.

This app chop-chop scans your Mac for duplicate and like files and allows you to delete them inside minutes. It keeps your originals safe and helps you easily remember files deleted past blow.
5. Remove old iOS backups
Backups can tend to take upwards a lot of infinite. You tin find and remove them by:
- Launching a Finder window.
- Clicking "Get" in the menu bar.
- Selecting "Go to Folder…"
- Then, type in
~/Library/Awarding Support/MobileSync/Backup/
Get rid of all the quondam, outdated backups your Mac has been storing for a scrap more extra space.
half-dozen. Remove large and erstwhile files

Keeping many large files on your Desktop and in Documents slows down the organisation. And if you delete merely a couple of these enormously big files, you can go half of your storage back.
Allow's open the familiar Most this Mac pane once over again. If you click Manage, you'll come across this window for sorting files.

While this instrument is good for finding large files, information technology misses a lot of things. See that "Other" category that takes upwards 38.GB?
To deepen your search for massive files, use this tool from CleanMyMac Ten. It'south called Large & Old files finder.

It'south much more helpful as it shows you lots of other categories of files, like Archives. The app breaks your files by Size and Last Used.
To see this musical instrument in action, download the costless edition of CleanMyMac Ten. And click the Large & Old files at the lesser of the sidebar.
7. Remove unnecessary applications

This isn't often overlooked, but definitely under-appreciated. Removing onetime, unused applications is a great way to get some extra space on your startup disk. Go through your applications folder and go rid of all the apps you lot rarely use. But make certain you remove them correctly, don't just drag them to the Trash. If y'all do, yous'll leave behind tons of leftover parts and pieces, and we're trying to get back startup disk space — Information technology'll kinda defeat the purpose, no?
This is some other place we'd advise using CleanMyMac 10. To completely remove any application, just launch CleanMyMac X, click Uninstaller, select your application, and and so click Uninstall. You won't have to search all over for development junk that's left behind when Trash'ing an application. It's incredibly easy and saves you tons of time.
eight. Move your Photos and Docs to the cloud

When your local storage is full to the brim, your Mac will start uploading this data to iCloud. But only if you have this setting enabled. Is your Photos app synced with iCloud already? Let's check.
- Open Applications and find the Photos icon.
- Launch Photos and click on Preferences in the top menu.
Ticking the box iCloud Photos will connect your Photos library to iCloud. And what's more than important, if y'all select Optimise Storage, some function of your Photo library will be moved to iCloud. This manner you macOS saves precious space. The costless iCloud plan allows you to free upwardly at to the lowest degree 5 GB worth of storage.

The similar logic applies to your Documents and other files. To set up the cloud backup with iCloud drive, get to System Preferences > Apple ID > iCloud.
9. Clean up your Downloads, Movies, and Music folders

Have a closer look at these three folders. Y'all'd be surprised at how many downloads can accumulate when you aren't paying attention. Clean out anything you don't need (or don't know) and organize the rest. It'll take a load off your listen to know that there'due south nothing excess there.
The Movies folder can be a pain, not because you lot're searching through tons of files, but it can be hard to cull what to delete. Personally, I never want to get rid of Top Gun. It'south astonishing. I watched it three times in a row last weekend. Only alas, sometimes you need to brand sacrifices for the health of your Mac. Though, what you can exercise with movies you want to keep is to archive them. Then, archive what yous wish to continue and remove the rest.
How to archive/compress a file
Archiving a file doesn't hateful to store deeper into the abyss of your Mac — simply to turn the file into something smaller, into a compressed file (like .goose egg or .tar). By archiving a file, y'all shave off some retention. Archiving is essential for things you want to keep on your Mac, simply don't often apply, and helps you clear up some space. And that'southward what this is all nearly right? We're essentially doing the hokey-pokey on your Mac. To archive a file, simply:
- Control-click the file y'all desire to compress (recommended for movie files).
- Select, "Compress ."
The concluding place to sweep through is the Music folder. Detect and remove indistinguishable music files kickoff, and so clean up all the songs you downloaded on a weird Sunday afternoon cleaning the house.
10. Clean your Desktop
"Clean my desktop… but why?" Considering some people'due south desktops are hard to await at, that's why. Organize your desktop and get rid of the stuff you but don't need on at that place. It looks amend and helps your Mac deed a fleck faster (I don't know the rocket science behind this one, but it feels besides good to be fake). Your Mac doesn't waste product time loading all those icons and junk, just… Just clean it, please.
xi. Empty out the Trash (No, we're not joking…)

Seriously: It may sound incredibly bones, but it could articulate a surprising amount of storage. I forget to do it all the time. The thing is, that when you delete something, your Mac doesn't remove information technology — it just moves information technology to the Trash. Plus, yous've probably deleted way more than than you lot realize, and all that could be sitting in the Trash, wasting space. So get rid of all that junk by emptying the Trash:
- Control-click your Trash in the Dock.
- Select "Empty Trash."
- And click "Empty Trash."
And, the easiest stride is done.

A few more tips to clear storage on Mac
1. Manage your Optimized Storage
This choice comes with your operating system starting macOS Sierra. Go to the Apple tree menu > About this Mac > Storage
Now, click on Manage to reveal the space-saving options:

ii. Erase your Junk Post
Open your Mail app, and click Mailbox in the upper bill of fare. Here you can erase spam and already deleted items.
Full Startup Disk Prevention
Nosotros've cleaned upward a few things on your Mac, and hopefully, it's given you more ideas equally to what else you can clean. But, let'due south take a look at how much infinite you saved from cleaning the list in a higher place. Remember how we checked your Mac's costless infinite? Open that window again and see how much space yous've cleared up:
- Click the Apple Icon in the menu at the elevation-left corner of your screen.
- Cull "Almost This Mac."
- Click Storage.
Note - If you are running an older version of macOS y'all may accept to get-go click "More Info…" and then "Storage".
You've probably got a scrap more than infinite, and yous'll want to go on it that way. The only manner to prevent a "your disk is almost full" is by keeping your Mac clean. Nosotros'd recommend a complete cleaning every 2–3 weeks.
Say goodbye to the "Your startup disk is almost full" bulletin.
We've told yous how to delete storage on Mac in multiple ways. Hopefully, this has helped yous fix that total startup disk trouble. Your startup deejay should now exist quite a bit lighter (nosotros hope). Oh, and if you liked this article, get social with it to help others in need. And if you really liked this article, subscribe to our email list — we've got more guides on the way. And we've likewise got a utility that'll assist y'all out a ton in the long run: CleanMyMac X. It helps you clean your entire Mac with just the click of a push button. It's incredibly easy to apply and works like a charm.

Source: https://macpaw.com/how-to/startup-disk-full-on-mac-os-x
Posted by: scogginsscame1947.blogspot.com
0 Response to "How To Clean Space Off My Mac"
Post a Comment